How to Customize the Push Pins for Entity Records to Visualize on the Map
AppJetty MappyField 365 provides a map visualization of the Dynamics CRM records. You can manage the sales activities, define the routes, and perform different actions for the team.
You can plot the records on the map by selecting the required entities. When you plot the records on the map, the records will be plotted using the different pins for different entity records.
You can change the push pin appearance for the specific records to recognize it on the map easily. You can also add a custom icon to personalize the entity records on the map.
Let’s see how you can plot records using a customized pin of your choice.
Step 1: Navigate to MappyField 365
After logging into Dynamics 365, click on MappyField 365 from the Dynamics 365 apps dashboard.
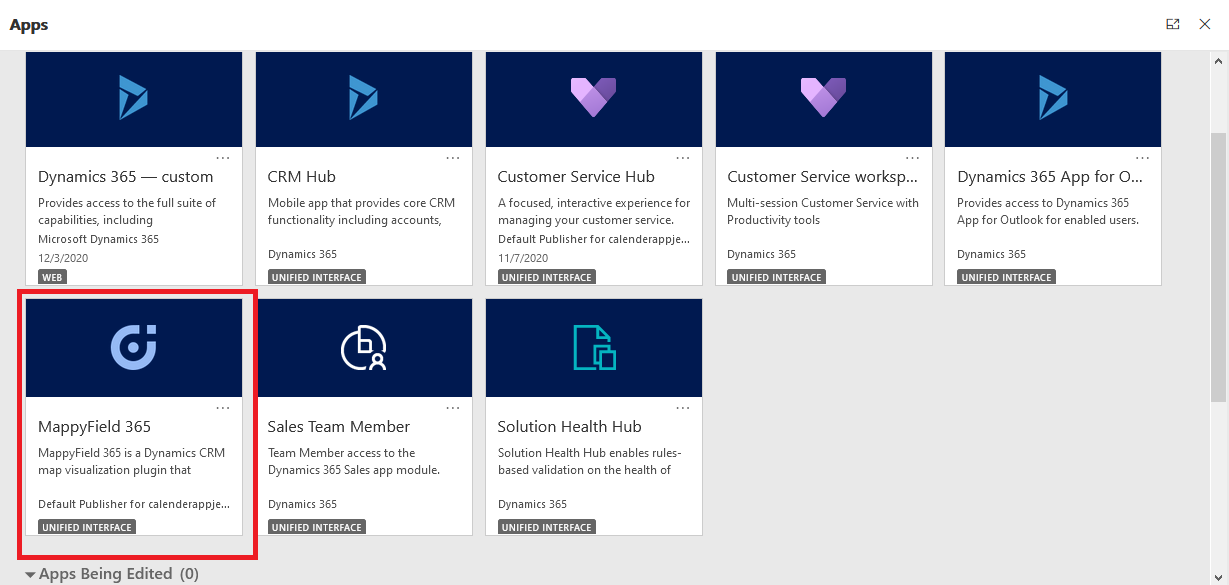
Step 2: Plot records on MappyField 365 map
Now, plot the records on the map by selecting the CRM entities that are configured from Entity mappings. Under the Plot tab, select the Entity and its Records view.
When you click on the ‘Plot’, you will see the pin by default. By clicking on the +Add Legend, you can add more entities and the pins will be selected automatically for the new entity. The pins that are selected here will be plotted on the map.
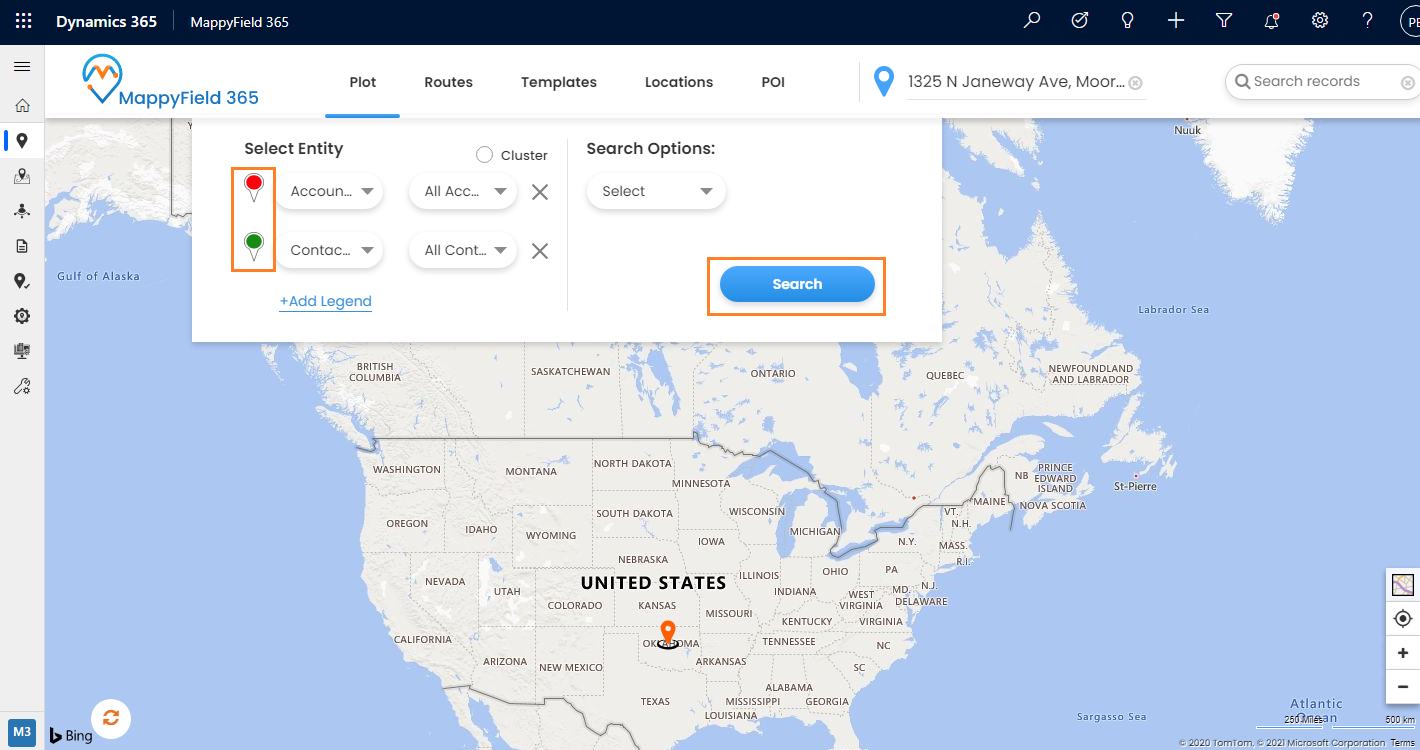
Here, the ‘Accounts’ & ‘Contacts’ entities are selected. Now clicking on the Search button, the entity records will be plotted on the map where the pins will differentiate the entity records.
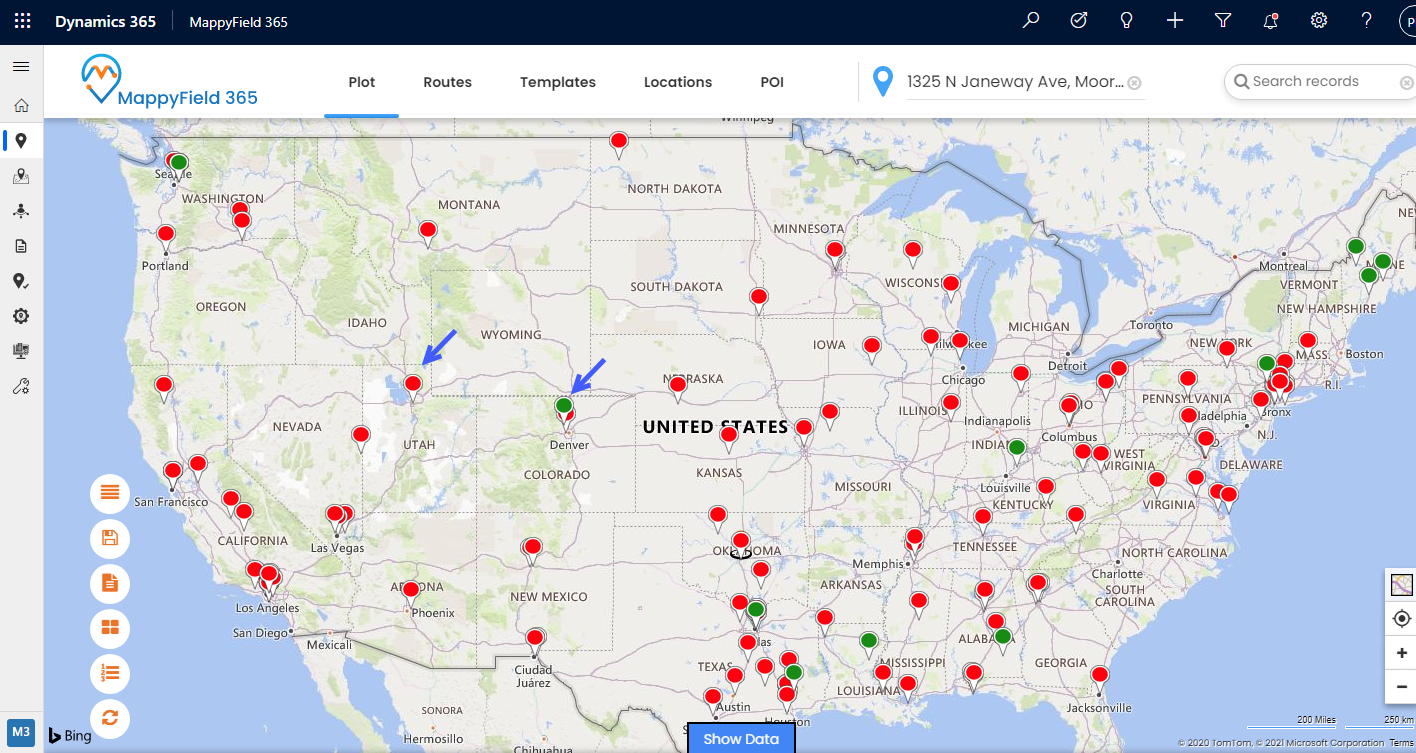
So from the pin color, you can visualize the entity records and perform the actions accordingly on the map.
Step 3: Pin selection and customization
Step 3A: Change the pin shape and color
Now, if you want to change the pin for the specific entity, MappyField 365 enables you to change, not just a pin color but you can select the pin’s shape as well to differentiate the plotted entity records.
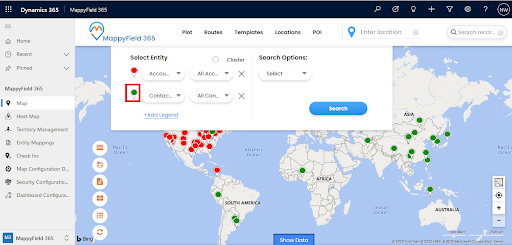
Under the ‘Plot’ tab, by clicking on the pin icon of the ‘Contacts’ entity, the pin selection tool will open. You can select the options of shape and color as per given combinations.
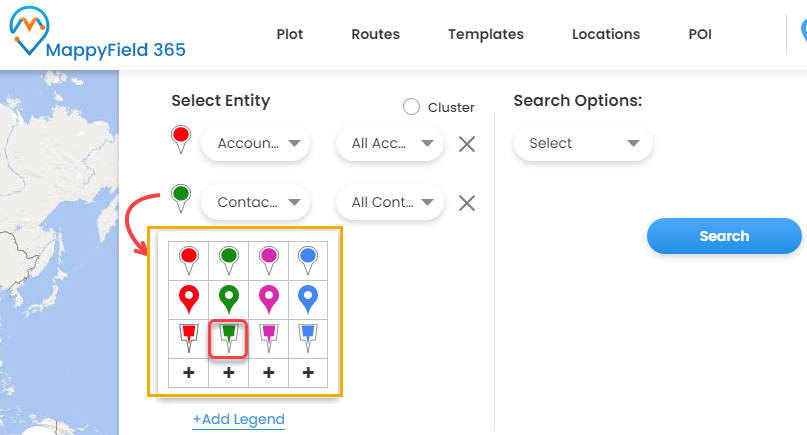
By selecting any of them (pin shape & color), the pin of the entity records will be changed and it will be replaced on the map.
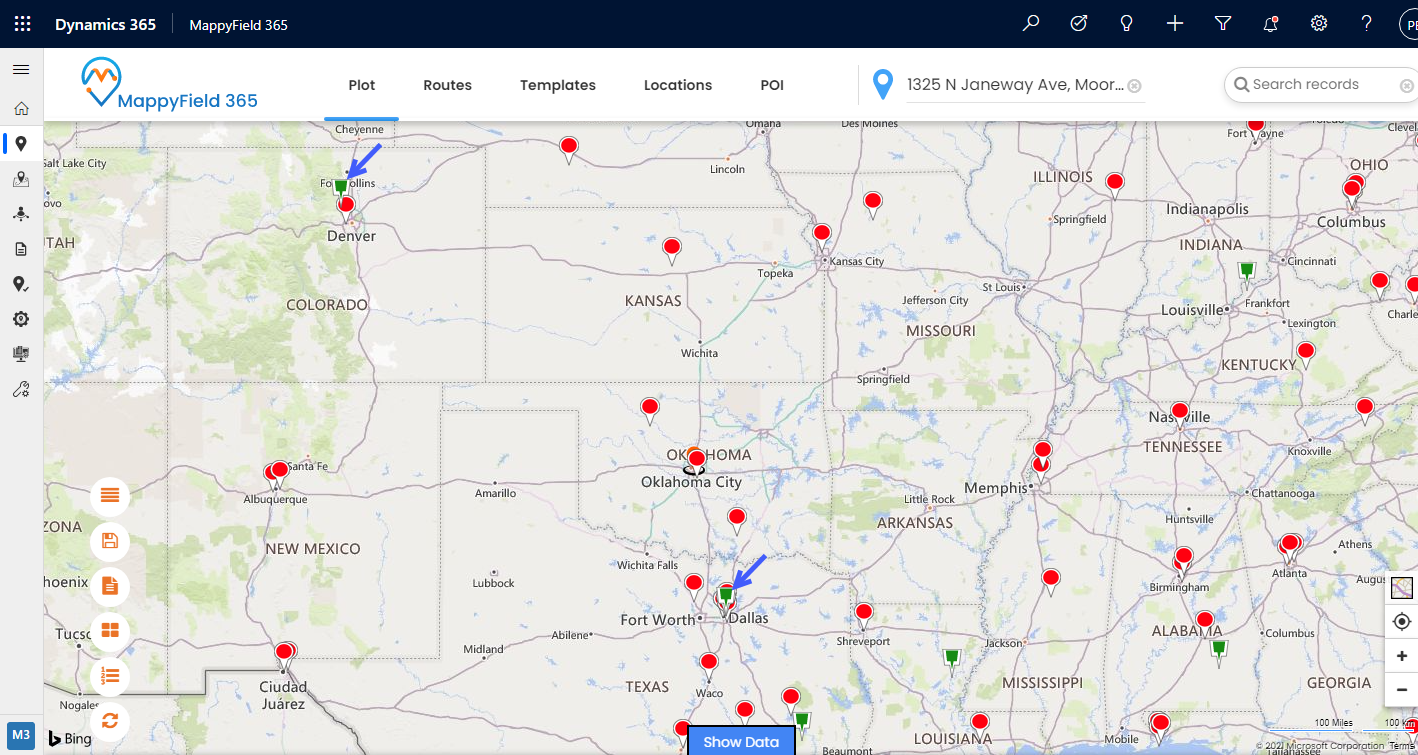
Step 3B: Add customize Pin icon
You can also add your push pin icon by browsing the image icon from your local drive to define and visualize the pins of the specific entity record on the map.
You can add the icon for the specific pin by clicking on the add + icon.
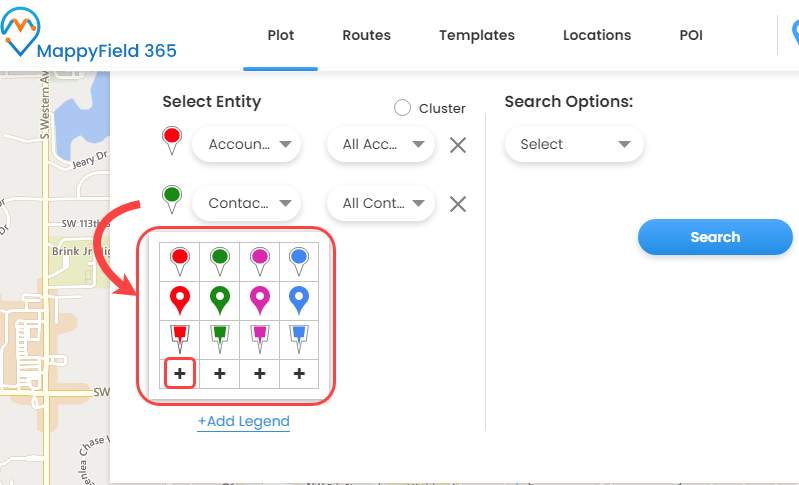
By clicking on the add + icon, select Custom Pin popup will appear from where you can add an icon to define the pin for the specific entity records.
Here you must insert the SVG file with a height of 30px and a width of 20px. You can download an SVG file for a sample or you can add a new SVG file.
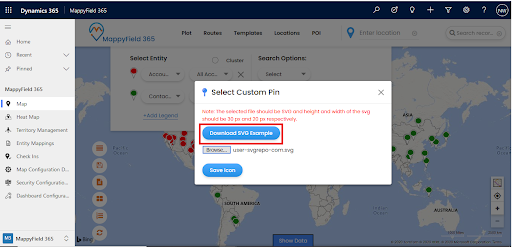
Once you have uploaded the SVG file, click on the Save Icon button that will add the selected icon to the pin selection.
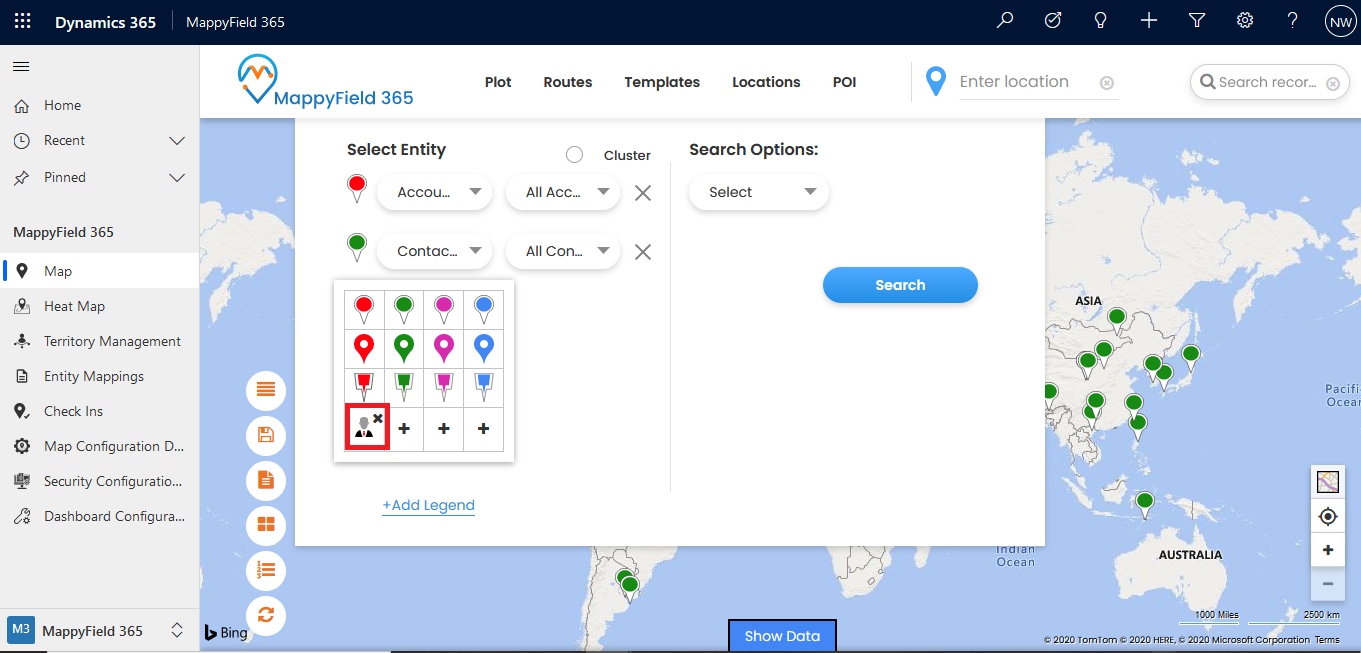
Now, by clicking on the newly added customize pin, the pins will be replaced with the new icon on the map.
You can see the new customized pin for the Contact records on the map.
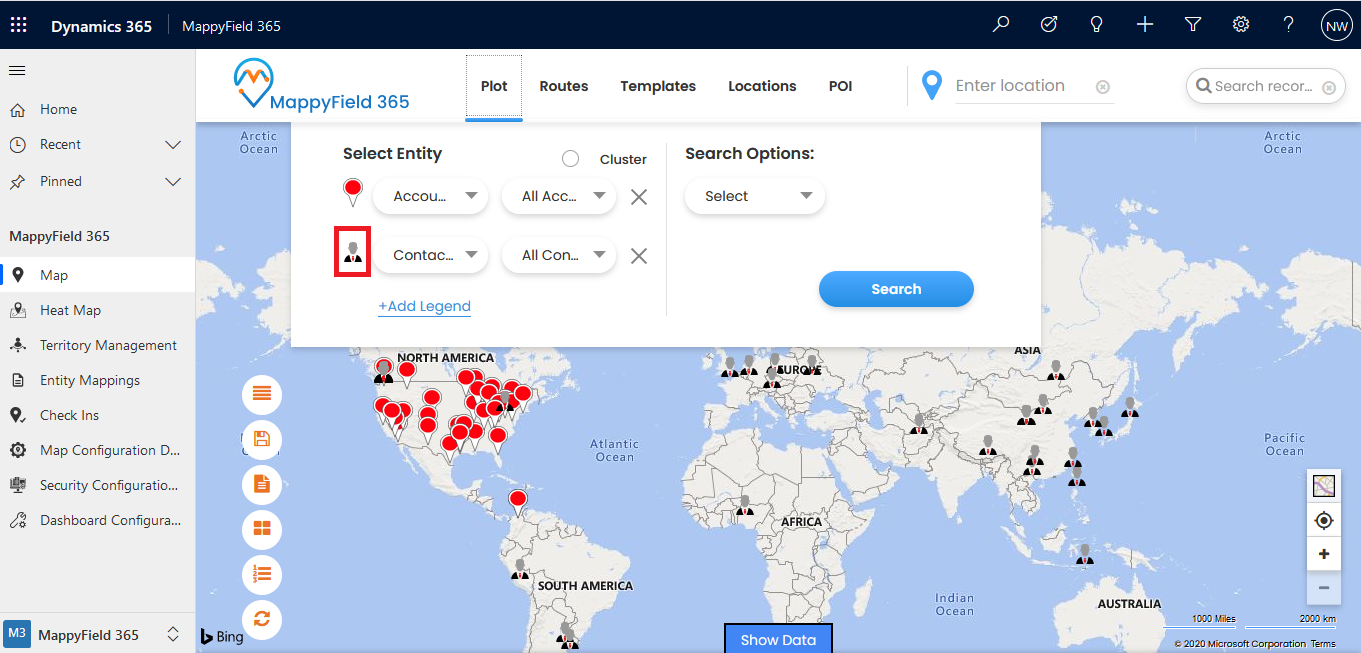
In this way, the users of MappyFIeld 365 can customize and change the pin icon to differentiate the plotted records on the map. It can help you get a visual overview of different records.

Comments
Post a Comment