How to Create Shared Calendar in Dynamics 365

This blog shows how to share a calendar view with your team members or any of the Dynamics CRM users.
If you are managing a team or multiple projects, then you know how messy it can get. Especially the communication part. Be it with the team or with multiple project managers, you might miss some of the other things during meetings.So, what if you could share a calendar view of all priority tasks with the required details among your team or with the project managers?
And that’s what we are going to show in this blog. How to save a calendar view and then share it with other Dynamics 365 users in your organization.
To do it seamlessly, you can browse on MS AppSource to find the right calendar that fulfills your requirements.
In this blog, we are taking Dynamics 365 Calendar, a Dynamics Calendar extension, to show you how to save and share a calendar view in Dynamics 365.
Step 1: Choosing a calendar extension
The first step here is that you will need to choose and install the right calendar extension in your Dynamics CRM. The default calendar in Dynamics CRM doesn’t have this functionality. With the default calendar, you can only see your activities in different calendar views. You won’t be able to create, add, save or share them.
Step 2: Creating and saving a calendar view with selected activities and users
– Open your calendar extension from the Dynamics CRM menu.
– With our instance, Go to AppJetty → Calendar 365
– With our instance, Go to AppJetty → Calendar 365

Here, you get two calendars: Resource Calendar & Customer Calendar.
– Resource Calendar: For User and Facility/Equipment management.
– Customer Calendar: For Contacts and Accounts management.
– Select a calendar from the two options according to the calendar view you want to create.
– Choose the required settings from left panel settings like selected resources, selected calendar view as well as, activities, selected status, priority, weekends and holidays to create a calendar view.
– After selecting the settings, click on the ‘Save’ icon available on the left side of the calendar to save that particular view.
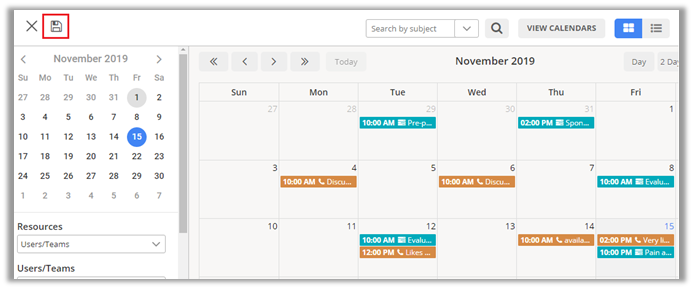
– After you click on the ‘Save’ icon, a dialog box opens, where you need to name the calendar view. Along with naming, you can define if it’s public or private.
– By default, ‘Is Public’checkbox is checked. If the calendar is public, it is visible to all CRM users with under ‘shared calendars’ section.
– By default, ‘Is Public’checkbox is checked. If the calendar is public, it is visible to all CRM users with under ‘shared calendars’ section.
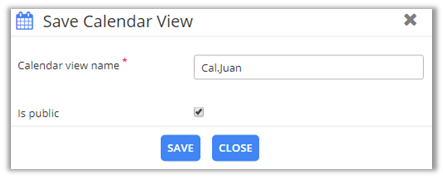
Note: You can only share a calendar with selected users if it’s not public.
– Click on the ‘Save’ button to save the calendar view.
Step 3: Sharing a saved calendar view
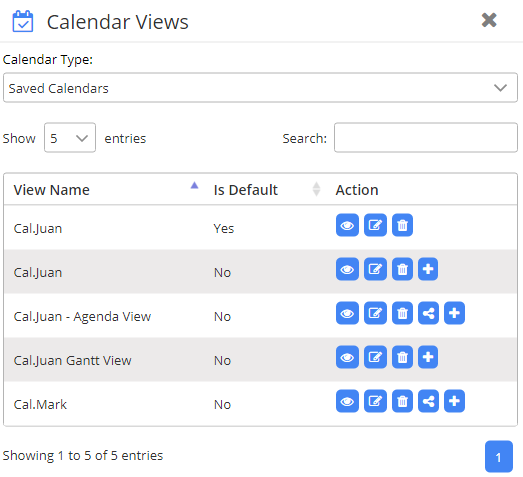
– You can access saved calendars by clicking on View Calendars button on the calendar page.
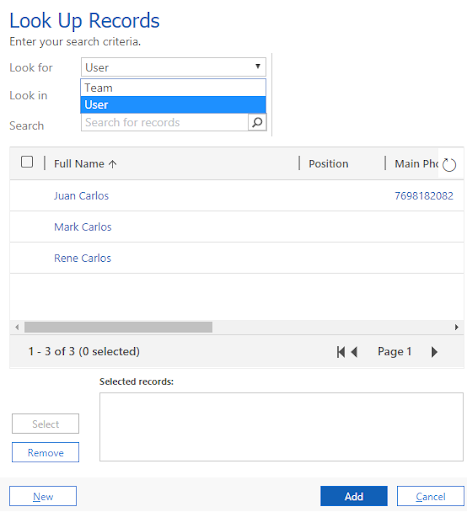
– After you click on ‘View Calendars’, a dialog box opens up with dropdown to select from calendar types: Saved Calendars and Shared Calendars.
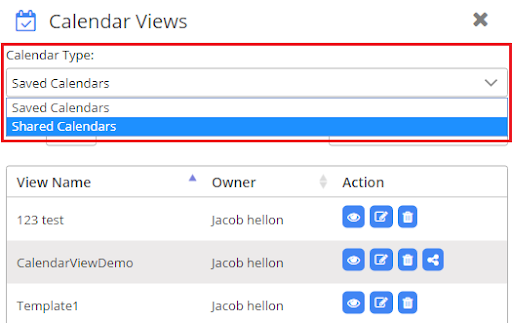
– ‘Saved calendars’ are the one which you have created and saved while ‘shared calendars’ are the one that is shared with you by other users or the calendars that are made public by other users.
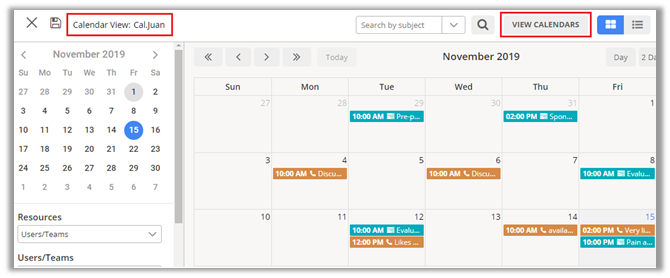
– Based on calendar type selection, you get a list of calendars.
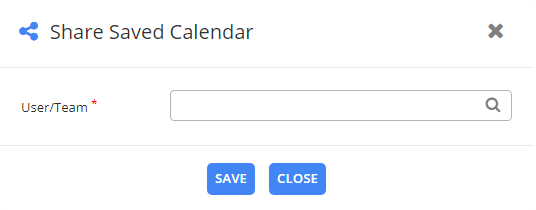
– Clicking on share icon beside the calendar want to share, opens dialog box to select a user or team from the lookup records box.
– Clicking on share icon beside the calendar want to share, opens dialog box to select a user or team from the lookup records box.
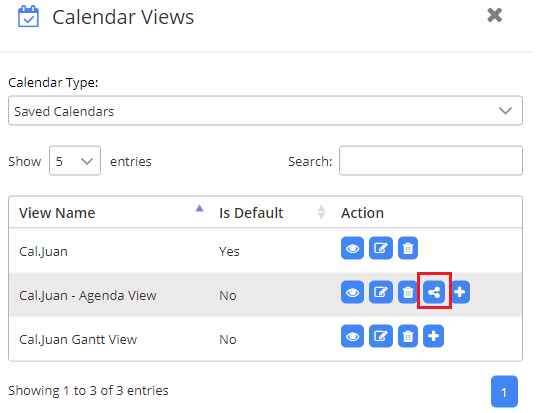
– After selecting the user, click on the Save button to complete the calendar sharing. You can select multiple users and teams to share the calendar with.
– When a saved calendar is previewed, it enables an action to go back to the current view (previous view).

How to Move Shared Calendar to Saved Calendar
– You can move the shared calendar to the ‘Saved Calendars’ list by clicking on the ‘Move’ icon.
– You can move the shared calendar to the ‘Saved Calendars’ list by clicking on the ‘Move’ icon.
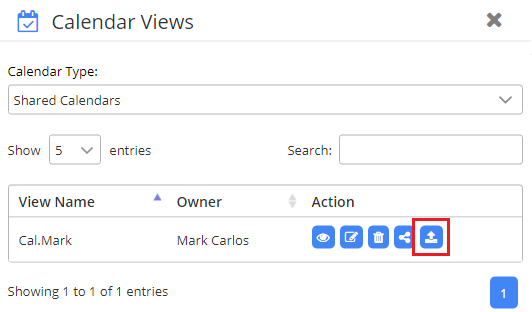
Now you can see a shared calendar in Saved Calendars list. You can make it default if you want.
Wrap up:
CRM is not just a customer relationship management tool anymore. You can leverage its capabilities to manage almost all aspects of an organization. Dynamics CRM is one such CRM.
So, the question you have to ask is, are you using your Dynamics CRM to its full potential?
Original Blog:https://www.appjetty.com/blog/how-to-create-shared-calendar-in-dynamics-365

Comments
Post a Comment